Having consistent access to high-quality strength equipment is fantastic. If you have benched on a bench made to competition specs, lifted in a power rack with compact hole spacings, or wrapped your hands around a bar with excellent knurling, then you surely know nice equipment makes a difference.
The only downside to regularly using good equipment is you become acutely aware of the drawbacks of poorly constructed benches, racks, and bars when you have no choice but to use them. You feel relatively unstable when benching, awkward when squatting, and your grip gives out much sooner when deadlifting.
Helplessly attempting to hang on to a bar with terrible knurling is especially frustrating. Combine smooth bars and the common commercial gym policy of disallowing chalk use, and you can expect to deadlift less weight for fewer reps than you normally do with nicer barbells.
Fortunately, this issue is very easy to remedy. All you need to do is purchase a pair of lifting straps to wrap around the bar and your grip will become a non-issue. Lots of guys on the internet whine about straps and state that using them is "cheating". These protesters need to realize that straps are an absolute necessity when dealing with bad bars. I have noticed my grip begin to slip as much as 50 to 100 pounds sooner when using bars commonly encountered in commercial gyms compared to when I use a Texas Deadlift Bar or my Pendlay NexGen HD Olympic Bar.
Most straps are relatively inexpensive, but it is worth noting that, just like strength equipment, the quality of straps varies. The IronMind Strong-Enough Lifting Straps and the Spud, Inc. Wrist Straps are widely used and recommend by many strong lifters. Some trainees, weightlifters in particular, prefer shorter, closed-loop straps. I have not had any issues using the lifting straps I got for free from Elite FTS, but I have only had to use them the handful of times when I have deadlifted in my school's rec center.
So, if you lift in a commercial gym and deadlift with bad bars without chalk, then strap up when the bar begins to slide out of your hands. It's not cheating - you're just leveling the playing field. You will not suddenly be able to deadlift as much as George Leeman, but you will be able to train your deadlift effectively rather than being held back by the equipment you use.
As a university underclassman, I often complained about being required to take general education courses. I was stubborn, and I did not want to waste my time studying things that were unrelated to strength and conditioning. If I didn't think it would make me a better lifter or a better coach, I didn't care to hear it.
"GE classes are useless!"
However, as I near the end of my undergraduate education, I realize that many of the general courses I have been forced to take have enabled me to view strength training through many unique lenses. The perspective I have gained from these courses has not necessarily caused me to invent amazingly effective new training means and methods, but it has allowed me to get a clearer view my role as a strength and conditioning coach in this day and age.
This fall quarter I am taking my final general education class, and it is an interesting course that focuses on the global environment. Two professors teach the class and tag team the lectures, and they discuss a variety of topics such as ecological systems, human impacts, and sustainability. Often, their analyses are bleak, as they convey that the human population is going to get larger, the amount of resources available are going to diminish, the world's poor are going to suffer more, and the climate is going to get harsher.
My twenty minute walk home from class is often spent trying to figure out what I, as only one individual on a gigantic planet faced with enormous challenges, can do to make the world a better place.
Given my educational background, my intellect, and my career path, it is unlikely I will discover a clean and powerful renewable energy source or figure out how to keep the ice caps from melting and the sea from rising. However, I have realized that I can help change the world on a much smaller scale. How?
By helping people get healthy and strong.
If there is one thing I have learning about strength training in the beginning of my brief lifting career, it is that the physical effects of lifting weights represent just a small portion of a well-designed and well-executed training program's impact.
You see, exercise seems to make people better people, and not all exercise is created equal. Don't you feel great after jogging on the treadmill and cycling through a bunch of different exercise machines? Well, imagine walking out of the gym after completing a training session consisting of targeted mobility drills, technically correct heavy lifting, and some intense conditioning work. Imaging using top of the line equipment and being coached by someone who is well-versed in the technical aspects of each exercise and is able to teach these maneuvers effectively. Imagine that coach has also outlined a long-term training plan that will enable you to work towards achieving your health, fitness, and athletic goals.
As that coach who will own that gym, I will not be changing the world directly. Instead, I will be changing the people who will, in turn, change the world. An overweight, out of shape, and unhealthy person is never as happy, confident, and productive as they would be if they were lean, strong and well-conditioned, and robust. The people I train are going to have the energy to walk or ride their bikes into town rather than drive. They are going to support wildlife conservation efforts because they will thoroughly enjoy being outside and being active. These individuals will think clearly and will be able to make informed decisions about their environmental impact. My trainees will have the courage to stand up for what they believe is right.
Training changes people, and those changes are not limited to their bodies. If our generation is going to change the world, then we must change ourselves first. As a strength and conditioning coach, I will enable many people to be the best version of themselves. I can change the world by making the people who impact it both physically and mentally stronger. You can change the world by taking control of your health and well-being. Together, we will save our planet.
Ask experienced lifters how to get bigger, and they will often tell you to get stronger. Ask experienced lifters how to get stronger, and they will often tell you to get bigger. While these answers are fairly accurate, they are not particularly helpful for guys who are skinny and weak, but want to become big and strong.
I believe that guys who are skinny and weak should not train exclusively using protocols for one objective (strength/size) in order to achieve the other (size/strength). Focusing only on strength or only on size and employing specific, specialized protocols in order to achieve that objective is not an effective strategy for these sorts of trainees. Often, low-volume strength routines do not allow for sustained progress in inexperienced lifters, as these lifters' limited size eventually becomes an obstacle for further progress. Similarly, high-volume hypertrophy routines usually lead to the same frustrations for these young lads, as they are not strong enough to gain appreciable size.
The solution for these skinny and weak individuals is to employ protocols that enable them to lift relatively heavy weights to improve their strength while also allowing them to accumulate enough volume to grow. In this article, I would like to offer a flexible protocol that meets both of these criteria.
Part 1 - Work up to a top set: The first part of this protocol involves warming up and working up to the heaviest weight you can lift for the designated number of reps. So, if you plan on doing sets of five reps (which I recommend for skinny and weak guys), then you will incrementally work your way up from light weights to the most weight you can lift for five reps. This is already a fairly standard procedure for most lifters, and I don't think a lengthy example is needed to demonstrate this simple process.
It is worth noting, however, that you are not required to do the exact number of reps that you plan on doing for your top set during each of your warm up sets. If you plan on doing a top set of five, for example, then doing only three, two, or even only one rep as you approach your top set will allow you to conserve some of your energy. This strategy can be a bit problematic for newbies who have no idea how much weight they will be able to lift for their tops set, though. If you are unsure of how much weight you will be able to use for your top set, then be conservative. If you underestimate yourself, don't be afraid to add some more weight to the bar and do another set.
Part 2 - Do some back-off sets: After completing your top set, take five to twenty pounds off of the bar and do another set, doing the same number of reps you did for your top set. If you want the training effect to be more strength-based, then do not take much weight off the bar and only do one or two more sets. If hypertrophy is your primary goal, then take off a bit more weight after your top set and do as many as four to six back-off sets. Also, you can use the same weight for each of your back-off sets, or you can decrease the weight slightly from set to set. Experiment with this part of the protocol and figure out what tweaks allow you to complete the highest number of high-quality heavy reps.
Part 3 - Go to failure: Following your back-off sets, you are going to take a little bit more weight off of the bar and you will wrap things up by doing a set of as many reps as possible. Push yourself to take this set as far as you can within the boundaries of acceptable lifting form. The number of reps you will complete in this set will vary, as it depends on how you are feeling on that particular day and how much weight you took off the bar. If you are consistently completing more than twelve reps for your final set, then you are probably decreasing the weight too much. Also, do your best to maintain control of the bar and use good technique. All too often, when lifters are told to do as many reps as they possibly can, they start pumping out ugly, uncontrolled reps. I urge you to take the set to failure without compensation (as many reps as you can, but no half reps, no bounced reps, and no ugliness).
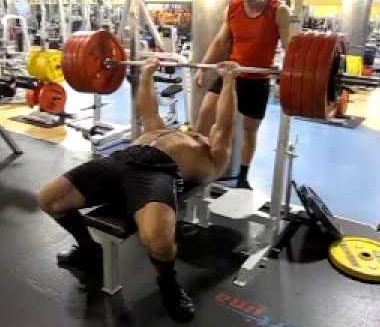
Example - Bench Press:
45 lbs x 5
95 lbs x 5
135lbs x 5
165lbs x 3
185lbs x 3
200lbs x 5 (Top set)
190lbs x 5 (Back-off set #1)
190lbs x 5 (Back-off set #2)
180lbs x 9 (Set to failure)
If you want to get both bigger and stronger, then you must lift heavy and you must accumulate a fair amount of volume. In order to do this, you must employ protocols that allow you to satisfy those two requirements. The protocol that I offered does just that, and it also provides lifters with some variables they can tweak to account for how they feel during each session. If you feel great, then you can set a PR with you top set, follow that up with a number of back-off sets, and then set a new personal rep record with a lighter weight. When you feel like garbage, do the best you can with your top set, only do one or two back-off sets, and finish up with a well-executed set to failure. Work within this proposed framework and strive to add weight and/or do a few more reps every session, and you will definitely be on your way to the promised land of size and strength.
...I had an article published on a major site for the first time in my writing career! This was a big step for me, and I am extremely grateful that the good people at EliteFTS gave me an opportunity to reach a larger audience. If you have not yet read my new article, then be sure to check it out by clicking the link posted below:
Thank you, EliteFTS! Also, I would like to thank all of the readers that have visited Strength Musings throughout the past few years. My family and my friends have been especially supportive of my blog from the beginning, and I really appreciate all of the encouragement they have provided me. Thank you!
I'm putting in my 10,000 hours. I think I am getting close, but the only thing I know for sure is that I know very little. Here's to continued progress!
Last week I was talking to my friend, who happens to be a very strong and very smart lifter, about mobility when I had a sudden realization: I suck at mobility work. Actually, to be honest, this realization was not exactly sudden; I had been growing dissatisfied with my knowledge of (not to mention my results from) mobility work over the past few months.
Ever since I learned about the joint-by-joint approach to the body in early 2009, I have regularly employed a variety of mobility drills before every training session. Additionally, I was an early adopter of foam rolling, and I have rolled on soft foams, denser foams, and eventually PVC pipes in order to improve the quality of my tissues. Early in my quest for better mobility, I was able to get rid of nagging knee pain that had made the last few years of my high school sports career quite painful. I did this by improving my ankle mobility, and I was instantly sold on the usefulness of mobility work.
Three years of anterior knee pain......gone in a week.
My mobility has gotten good, but not great, and I have not been able to make significant improvements in my joint mobility for quite some time. I have used a standard mobility routine before all of my lifting sessions, and this routine often requires 30+ minutes to complete. Every time I do this warm-up, I notice that I am continually fighting against the same restrictions in the same joints. I am able to make slight mobility improvements that allow me to adopt correct lifting positions, but these improvements are history by the time my next session rolls around.
If insanity is, in fact, doing the same thing over and over again and expecting different results, then I have been crazy for a couple of years now. I have been able to get by with what I know and, up until this point, I have not felt the need to make drastic alterations to my mobility practices. However, this complacency disintegrated when the friend I was discussing mobility with told me he was close to being able to squat with his toes forward, a feat that requires tremendous ankle and hip mobility. My friend informed me that he had identified some mobilizations on Kelly Starrett's MobilityWOD that he found helpful, and has been doing a few of these mobilizations nearly every day.
Now, before talking to my friend, I had checked out MobilityWOD and cherry-picked a couple of mobilizations that I liked and added them to my warm-up routine. However, I had never spent a lot of time trying to identify and understand the main principles of Kelly's teachings. With renewed motivation stemming from my brief chat, I finally got around to immersing myself in Kelly's website and all I can say is......I am an idiot.
The Mobility Man.
I spent nearly half a day watching MobilityWOD videos, reading the accompanying blog posts, and practicing a number of mobilizations, and I started making some notable progress in my joint mobility. After not seeing significant mobility improvements in a few years, a few hours of research allowed me to explore ranges of motion that I had never experienced.
If you have been following MobilityWOD for a few years, then you probably think I am a fool for failing to recognize the power of K-Star's teachings (which I think is a fair judgement). If you have never checked out MobilityWOD, then you are probably wondering what all the fuss is about. For those of you in the second camp, I urge you to spend some time on Kelly Starrett's site. Additionally, be sure to adhere to the following tenets that I list, as they detail realizations I had about what Kelly is doing right and what I was doing wrong.
1. Do a little every day: MobilityWOD literally means Mobility Workout Of the Day, and there is a reason for that. In our day and age, most people have a number of mobility deficiencies they need to address, as sitting and inactivity characterize the majority of individuals' daily lives. If you are determined to counteract years of bad habits and trauma, then you must commit to years of good habits and restoration. When you are getting ready for a lifting session, dedicate at least 10 to 15 minutes at the beginning of the session to mobility drills that are specific to the lifts you will be doing that day. Think about the bottom and top positions of the lifts you have planned, and figure out which mobilizations will enable you to improve your positioning. Conversely, on days that you are not lifting, devote some time to your problem areas. Everyone should be able to find at least 10 to 15 free minutes in the morning or before bed, and few activities can make for a more productive use of a quarter hour in terms of health and well-being. So, mobilize! Finish this article, then get to it!
2. Time it: You will never realize how long two minutes of stretching is until you put two minutes on a timer and wait for the relief of the alarm. Why two minutes? Well, Kelly says that is about how long it takes to tap into the viscoelastic properties of tissues and start to make changes. This makes sense, and it really seems to work. If you have been mobilizing without regard for time, then you will probably be struck by how little time you actually spend on each individual mobilization. Most people spend about a minute on ten mobility drills, when they could spend four minutes on a single drill and make far more significant changes. It is worth mentioning, however, that two minutes is not a cure-all, magic number for everybody. Kelly likes to say that you should stick with a drill until you make change and continue until you stop making change. How do you measure change? This is where testing and retesting come into play...
3. Test-retest: Testing before and retesting after each mobility drill is crucial, as determining whether or not the mobilizations you are using are actually working is too logical to be left undone. Before you start mobilizing, you need to gauge where your movement capacity is at before the intervention. This drill can be a simple, single-joint mobility test, but using a relevant movement is a better approach. So, if you are trying to improve your hip flexion and external rotation in order to squat better, then squat before you do the stretch and after you do the stretch. The flexion and external rotation stretch that you do should translate to improved flexion and external rotation while squatting. You will not know if this is the case unless you test then retest. Don't be lazy and skip these steps!
4. Stop kidding yourself: One of the primary reasons I did not feel the need to expand my knowledge of mobility and make changes to my warm-up routine was that I didn't think my joint mobility was all that bad. However, my mobility is not all that good, either. I have the movement capacity to do all of the lifts I want to do, but I always need to spend a lot of time recovering this capacity before every session. I am always on the verge of poor positioning, bad technique, and unproductive training sessions and, while I have largely been able to stay in control of my mobility and my training, I can no longer justify this risk. I have realized that I need to stop kidding myself; I need to get better, and I believe the time I have spent (and will spend) learning from the MobilityWOD videos and working to improve my mobility will greatly benefit my lifting. If you are in a similar situation, then I urge you to do the same. Start here:
I still remember the first time I ever played a football game. I was in elementary school, and when I intercepted a pass I didn't know that I was supposed to run it back the other way. I just caught the ball and stood there, until the guys who were on my team yelled to me and told me to run. I was good at football, and I loved playing it. I was athletic, I could catch, I had a knack for making interceptions, and I could outrun most kids when I got the ball.
When I first started playing organized football during my freshman year of high school, I did well. I started at cornerback for my freshman team, and I made a few interceptions during the season. At the end of the year I was awarded the Best Defensive Back trophy for our team, which I was very proud of. During my sophomore year, I started playing as a wideout a lot more, and I scored a handful of touchdowns. Given my success on the field, my passion for the game was at an all-time high, and I could not wait to play for my town's varsity team under the lights on Friday nights.
Unfortunately, however, my career as a varsity player was depressingly uneventful. I expected to do well, but my performances were always disappointing. My football career ended poorly because, to put it bluntly, I was too skinny and too weak to compete at the varsity level. After looking forward to having a sticker on my helmet and making plays in front of my hometown fans for years, my football career ended on a sour note.
I hate to sound like Uncle Rico, but I think I could have been pretty good if only I knew how to lift weights and eat in high school. My lack of success was a blessing in disguise, though, because it motivated me to dedicate myself to figuring out how to get bigger, stronger, and more athletic. Hopefully, the knowledge I have been driven to acquire can help a number of players realized their potential on the gridiron in a way that I never did.
The following article discusses in-season training for football, and it is written as if a football coach were giving a speech to his players. I had fun writing this piece, and I crammed a lot of information into it. Enjoy! (And utilize.)
In-Season Training for Football
"Listen up, fellas. This year we are changing things up a bit. Instead of doing all of our lifting in the morning, before the sun comes up, we will do two training sessions that will occur before our practices on Monday and Wednesday of each week. I know y'all loved rolling out of bed and yawning your way through your workouts at 6 AM, but we realized that this schedule is not conducive to getting strong. Sure, rising before the rooster might have taught you some self-discipline, but adhering to a solid strength and conditioning program and practicing every weekday afternoon should be just as effective in developing your moral fiber, not to mention your muscle fiber.
"You see, muscle is important. Football can be a brutal sport, and those pads only do so much. Muscle is armor, and having it will provide you some protection on the field. Not only will this body armor make it easier to withstand the impacts of an entire season, but it will also give you some extra confidence on the gridiron. Knowing that your body is built to handle high-speed collisions will enable you to go all out and make plays that win ball games. Safety and performance? Sounds like a good deal to me!
"Getting back to our new schedule, allow me to fill you in on why this will work better. School, football, lifting, then homework makes for a pretty demanding day, and sleep is important because it allows you to keep up with these demands. If you are going to get enough sleep for a teenage boy, around 8 or 9 hours, you might have to neglect some of your homework. We don't want that; we want you to perform well both on the field and in the classroom. Back in my day, we lifted in the morning, too. I remember walking out of the gym after a
lethargic workout and seeing a full moon, but I don't remember ever
setting any lifting PRs before the sun came up. Forcing y'all to get up at 5:45 so you could grab a quick snack and drive to the weight room did not allow you enough time to rest and recover. What's that? Y'all usually come in here and lift on empty stomachs? Well, we are going to change that as well.
"At the very least, you should all chug a protein shake and eat a piece of fruit before you lift. Haven't you learned about the benefits of protein supplementation and its effects on muscle protein synthesis in biology? You haven't cover that? That's alright, you don't need to know all of the science behind all of this training and nutrition stuff to get results. Hell, I don't even have to know all of it, but I do make an effort to educate myself about some of those things because I want you guys to stay safe and play well on Friday nights.
"Alright, let's start talking about our new training plan. After school on both Monday and Wednesday, you will immediately eat some good food and/or drink a shake, change into your gym shorts, and head to the weight room. Before lifting, we will do a brief warm-up. Yeah, I know we didn't always properly prepare for our morning sessions, but we are changing that. We will mobilize the ankles, the hips, the upper back, and the shoulders. Ensuring that we have enough range of motion in these areas will allow us to adopt correct lifting positions, which will make our training safer and more effective, and will ensure that we are not restricted while moving about on the field.
"Once we finish this warm-up, we will start our lifting. Instead of doing a bunch of little exercises, we will focus on the exercises that are most effective: the squat, the deadlift, the bench press, and the chin-up. On Mondays we will squat and do our chin-ups, and on Wednesdays we will bench press and then deadlift. We want to get as much out of every session as we possible can in the time that we have, so we will superset these lifts with other exercises and mobilizations. Between sets of squats, you will do more mobility work for your ankles, hips, or shoulders, depending on where you are most restricted. Chin-ups will be paired with a single-leg movement, such as split squats or rear-foot-elevated split squats. Single-leg movements are important, as they will improve the stability of your hips and your knees. When we bench, we will do dumbbell rows in-between our sets, as this will improve our scapular stability, which should decrease the amount of shoulder problems we encounter throughout the season. Lastly, we will pair deadlifts with mobilizations, as we did with the squats. Being mobile is important, haven't you fellas watched Remember the Titans?
"If we have time, we may do one or two more exercises. Don't expect much variety, though. We will be doing the big lifts week in and week out while focusing on proper technique and adding weight progressively. Forget all of that P90X 'muscle confusion' BS you hear on TV. If you want to get strong, then stick to the basics. Learning to lift correctly takes time, and we only have so much of it. Let's do a few effective lifts well instead of running through a bunch of ineffective exercises poorly. We can mess around with all of that other stuff, like 'plyometrics', in the off-season.
"After lifting, each of you will quickly grab a protein shake. If you want to bring your own protein in a shaker bottle, that's fine. But, we will have a couple of bags of protein available for those of you who need it, thanks to the money from donations that we used to spend on pizza in the past. Hell, if we all get big and strong and start winning, then you boys might start getting some free meals around town that are a whole lot better than pizza.
"In the meantime, though, y'all gotta start eating better, and more. If you keep having a Gatorade and a few fries for lunch, then you can count on getting knocked on your ass when you step out onto that field on Friday. Food is energy, and you need energy to think in school, to lift heavy weights, to run and tackle on the gridiron, and to grow big and strong. That's a lot of energy you need and, therefore, a lot of food you have to consume. As coaches, we can't control everything you do each day, but we can talk about eating habits and do our best to make sure you know they are important. Eat meat, cook some eggs, have some veggies, and, if you can, drink milk. Stay away from candy and sugary drinks, but eat a ton of food. If you eat a lot and build muscle, the wins will come.
"Sure, our lifting will cut into our practice time a little bit, but I'm not worried about that. I am tired of seeing my guys get laid out, and perfecting our plays is not going to make up for our lack of size and strength. They can't lick us if we get big, strong, and fast, so let's get to it!"
In a few days I will be driving down to school to begin my senior year of college. I am excited, and most of my musings during the last few weeks have centered around how I can make my final year of school fun, fulfilling, and productive. However, in this time, I have also outlined no less than ten new articles that will be appearing on Strength Musings in the near future. Additionally, I have been generating ideas for a book that I plan to write and published in the next few years. Yep, the future looks bright (and busy!), and I am looking forward to the work that lies ahead of me.
My last year at Cal Poly SLO
In the meantime, I figured this was the perfect opportunity for a second Cliche (But Awesome) Music Post. Just like the first music post, I will start by introducing a couple of lighter songs that I enjoy listening to as I prepare for my training sessions. Then, I will provide you with some songs that you can blast while you lift. Different people have different tastes in music, so I did my best to include a variety of songs. If you find one or two that you want to add to your gym playlist, great!
1. "Lost River" by Murder By Death: I introduced one of my favorite bands, Murder By Death, in my first music post, and I couldn't help but share a second song of theirs. This is a song off of their new album, and I was lucky enough to see them play this song live over the summer. I said it once, and I will say it again: Do not miss out on seeing this band live if they are in a city near you!
2. "Walk (Acoustic)" by Foo Fighters (Dave Grohl): Love him or hate him, you have to admit that Dave Grohl is an amazing musician. While I like the album version of this song, I find the acoustic version to be particularly powerful.
3. "Hook" by Blues Traveler: When I first heard this song a few months back, I could not believe that I had never heard it before. I love music, so when I find a hidden treasure like this, I assume that the majority of people have not heard it, either. Enjoy!
4. "Fight The Good Fight" by Triumph: Getting into some lifting songs, I will begin with a song that I heard for this first time this summer. If only Canada gave us more great music like this and less Justin Bieber, eh?
5. "Never Change (Remix)" by Jay-Z (Big Z Remixes): All of my brothers and a couple of my friends absolutely love this song. If you like hip-hop, then this song is for you. If you like snowboarding, then this video is for you. If you like hip-hip and snowboarding, then boy oh boy are you in for a treat.
6. "T.N.T (Live at Donington)" by AC/DC: For every great song, there is always one live performance of that song that is legendary. If time travel is invented in my lifetime, then this is one of the many concerts I will be attending.
7. "Estranged" by Guns N' Roses: Think "Welcome to the Jungle" and "Sweet Child O' Mine" are all Guns N' Roses has to offer? Think again...
8. "Fall Back Down" by Rancid: Growing up in the Bay Area, Live 105 was my station of choice. While my commercial-less iPod has caused me to dread the radio, I thank this station for introducing me to a number of excellent songs.
Thanks for reading, and do not hesitate to suggest some songs in the comments section of this article!
Competing in a push/pull meet is a great way to get your feet wet in the sport of powerlifting. While a full powerlifting meet consists of three lifts (the squat, the bench press, and the deadlift), a push/pull meet requires lifters to do just the bench press and the deadlift. Usually, lifters competing in the push/pull portion of a meet lift earlier in the day, completing their three bench press attempts and their three deadlift attempts before the full meet begins. This format is much less grueling than a full meet, which is often draw out over the course of an entire day.
Training for a competition can be a very insightful experience, as the strict deadline of the contest usually influences a lifter to streamline their training program. Furthermore, most lifters find they are much more focused when they are preparing for a competition. These factors can make the training cycle that precedes the meet a very productive one.
If testing the waters of competitive powerlifting by doing a push/pull meet intrigues you, then I urge you to take the plunge and find a competition near you. Once you have identified and registered for a competition, put together a training program that will prepare you to lift well and set some PRs in the meet. For those of you that do not know where to get started in the meet preparation process, I offer the following training program.
Strength Musings Push/Pull Preparation Program
Week 1
W1D1: Bench Press - Progression 1: 3 sets of 5, Progression 2: 4-5 sets of 5 @90% Friday's top set Deadlift - Progression 1: 1 set of 5, Progression 2: 3 sets of 3 Pendlay Row - 3 sets of 6
W1D2: Squat - Progression 1: 3 sets of 5, Progression 2: 1 set of 5 Bench Press / Pause Bench Press - Progression 1: 3 sets of 5, Progression 2: 3 sets of 3 (paused)
W1D3: Bench Press - Progression 1: 3 sets of 5, Progression 2: 1 set of 5 Deadlift - Progression 1: 1 set of 5, Progression 2: 5 sets of 1 Pendlay Row - 3 sets of 8
Week 2
W2D1: Squat - Progression 1: 3 sets of 5, Progression 2: 3 sets of 3 Bench Press - Progression 1: 3 sets of 5, Progression 2: 4-5 sets of 5 @90% Friday's top set Pendlay Row - 3 sets of 6
W2D2: Bench Press / Pause Bench Press - Progression 1: 3 sets of 5, Progression 2: 3 sets of 3 (paused) Deadlift - Progression 1: 1 set of 5, Progression 2: 1 set of 5
W2D3: Squat - Progression 1: 3 sets of 5, Progression 2: 5 sets of 1 Bench Press - Progression 1: 3 sets of 5, Progression 2: 1 set of 5 Pendlay Row - 3 sets of 8
Program Notes
Progression 1: The first progression for each lift is a simple linear progression. The sets and reps stay the same from session to session, and you add weight to the bar each session. Your starting weights should not be particularly challenging, and you should add 5-10 pounds to each lift every time you train that lift. As progress begins to slow, begin to take smaller weight jumps. This means that you will add just 2.5-5 pounds (or less, if desired) to your lifts. If progress begins to stall, and you begin to miss reps at the end of your sets, then switch to the second progression for that lift. However, it is important to assess whether or not the lack of progress is due to inadequate caloric intake and/or sleep rather than insufficient recovery time. Do not switch to progression two with a lift that is still making consistent progress with progression one; stick with the first progression for each individual lift until gains begin to flatline. It is worth noting that progress in the bench press will usually slow down the soonest, followed by the deadlift and, finally, the squat. This obviously depends on other factors, such as how much time you have dedicated to each individual lift in the past, so do not think of this tip as a steadfast rule.
Progression 2, Bench Press / Pause Bench Press: The second progression for the bench press is a variation on programming made popular by the Texas Method. In a "standard" Texas Method template, lifters often alternate between the bench press and the overhead press every workout. In this push/pull program, however, you will bench press on Day One and Day Three, and you will do 1-second pause bench pressing on Day Two. The sets and reps for this progression stay true to common Texas Method recommendations, beginning with higher volume, followed by a lighter session aimed at recovery, and then finishing the week with a higher intensity session. I like to describe this incredibly flexible template as "stress-rest-test". You will be imposing a fairly significant stress on your body on Day One by doing 4-5 sets of 5 reps at 90% of the top set you did on the bench press on Day Three of the previous week. Then, on Day Two, you will lighten the load slightly to simultaneously rest from Day One's session and prepare for Day Three's session. Usually, 80% of the top set you did on the previous week's Day Three is used. Then, on Day Three, you will work up to 1 set of 5 reps, using a weight that should be a 5 rep PR (not necessarily an all-time PR, but a weight that is heavier than what you used the week before).
Progression 2, Squat and Deadlift: After topping out on 3 sets of 5 in the squat or 1 set of 5 for the deadlift, you will transition to using an extrapolated version of the 3/1/5 program. You will start with 3 sets of 3 on Day One, do 5 sets of 1 on Day Three, and you will finish with 1 set of 5 reps on Day Two of the following week. You will do your best to add 5 pounds to the bar every session, as you did with the initial linear progressions. However, if your lifts begin to stall, you have a couple of options. You can decrease the amount of weight that you use during your Day Three sessions, dropping back from your Day One weight and then bringing the weight back up for the 1 set of 5 on Day Two of the next week. This alteration will allow you to be a bit more rested for your 1 set of 5 for that particular lift every other week. Another option is adding one or two more sets to the Day One session, doing 4 or 5 sets of 3 rather than just 3 sets of 3. Doing so will increase the magnitude of the stress that this training session imposes, which should spark new progress (provided you can recover from the increased workload). A third idea is to switch the 1 set of 5 on Day Two to 1 set of 3. This change should allow you to continue to increase your Day Two weights for a few more weeks, as the difference in the training effects caused by sets of three are different enough from the effects sets of five have that there should be untapped potential in your triples. These are just a few possible alterations to the 3/1/5 template, all of which can be mixed and matched with any other ideas that you believe will work. Whatever you choose to do, I urge you to do your best to stay within the "stress-rest-test" style template.
Sets Across: Throughout this program, you will be using sets across for all of your work sets. This means that you will gradually work your way up through your warm-up sets until you reach the top weight you will be using for that movement on that day. You will then complete the designated number of sets without increasing or decreasing the weight on the bar. When doing sets across, be sure to take as much time in between sets as is necessary to complete all of the reps of all of the sets. Obviously, if you find that are consistently having to rest much longer than five minutes to get all of the necessary reps, then you should consider advancing to the next progression for that lift, or make slight alterations to your programming.
Pendlay Rows: Pendlay rows are included in the program to build some additional back size and strength to aid both the bench press and the deadlift. Begin with a weight that you can easily do for 3 sets of 6 reps on Day One, and then use the same weight for 3 sets of 8 reps on Day Three of the same week. When you do the movement again on Day One of Week Two, add 5-10 pounds to the bar and complete 3 sets of 6 once again. On Day Three of Week Two, you will use the same weight for 3 sets of 8. Continue this progression from week to week, and make smaller weight jumps if progress slows. When doing Pendlay rows, be sure to keep your form fairly strict, resisting the urge to allow your torso to rise excessively on the concentric portion of each rep. (Also, if you enjoy this simple progression, be sure to check out the "Bigger Arms in Less Time" program.)
There you have it, a flexible template that will enable you to train effectively for your upcoming push/pull meet. Start light, follow the progressions, be patient, train hard, and eat a lot of food, and you will be pleased with the results on meet day. I understand that some of the information about the progressions may be difficult to follow, so do not hesitate to contact me through email (amcgunagle@gmail.com) or on Facebook if you have any questions.
My mental model of the strength training process always seems to be much clearer than it was just six months before. I lift, I study, and I think, and then I do my best to synthesize what I have learned into a framework that will improve my training and the training of the people that I help. My ideas are never perfect or complete, as I always look back on my prior knowledge and laugh at how thoroughly incomplete my views were. However, I realize that I am a bit further along in the process than a lot of people due to the time that I have dedicated to this endeavor, and relaying what I have learned can help them in their quest to understand the strength training process. So, here is a summary of what I think I know so far. Surely my views will evolve as I educate myself, but I do believe there are some "truths" inherent in what I have learned up to this point. My summary is fairly simple and will seem very basic to many of you. If you already know all of this, then ask yourself how you can employ it more effectively. Here it goes:
How to Get Bigger and Stronger
Squat, press, deadlift, and bench press with the barbell using technique that is mechanically efficient. When your technique feels off, think about how to make it conform to the biomechanical ideal rather than customizing it with strange permutations. Do the mobility work necessary to allow your body to adopt the positions that you want it to adopt, using drills that are specific to the lifts that you do. If you are skinny and weak, then focus on sets of five to build both strength and size. Use a workload that induces adaptations, structure your training to recover from that workload, then lift again in the optimal time frame and increase your workload for further progress. Eat a lot of quality food, focusing on meat and vegetables. If you can tolerate it, add in large quantities of milk in addition to your high calorie meals when you want (need) to gain weight. Rest and recover on your off days, making sure to take in the calories needed to recover from your last session and prepare for the next one. Maintain good sleeping habits, consistently getting around 8 hours of sleep while doing your best to go to bed and wake up at standard times. Occupy yourself with quality activities, such as reading, between sessions rather than worrying about your training program. When you have a bad session, diagnose the problem as simply as possible and then determine whether or not you need to make (minor) adjustments to your plan. Account for periods of substandard recovery and layoffs from lifting by being conservative and, potentially, backing off slightly. Always be in control of your training plan and do the things outside of the gym that are necessary to make it work. Thoughtfully adjust your plan as you progress, or when you run into trouble/life. Be consistent.
A few years ago, during my freshman year at Cal Poly, I got in touch with a bright young strength coach named John Cortese. John was close to graduating from Cal Poly at the time, and he was working towards opening a gym in his hometown of Napa, California. During the past couple of years, John and I have kept in touch, and, through Facebook, I have watched him build his business into what is now an awesome warehouse gym.
Last week I drove out to John's facility to talk to him about starting a warehouse gym. I am hoping to open my own facility soon after I graduate, and I knew that John could offer me a lot of great information about the process. The insights that John provided me were excellent, and his advice made me much more confident in the direction that I am heading.
Also, John thought it would be helpful to other individuals who are in a similar situation that I am in to videotape our conversation. This was a great idea, as it resulted in an excellent six-part interview that we can share with everyone who is interested. So, here are all six parts of the interview I did with John. If you are interested in starting a warehouse gym, then it is well worth your time to watch this fifty-minute video series.
(Thank you, John, for taking the time to meet with me and provide me with so much great advice. I truly appreciate all the help you have given me throughout the past few years, and I am glad other future strength coaches will be able to benefit from out talk!)
Thanks for reading and watching! If you live in, or near, Napa, then be sure to check out CTS Strength & Conditioning. Find out more about John and his gym at http://ctsgym.com/
The International Powerlifting Federation, more commonly known as the IPF, is one of the premiere powerlifting federations in the world. While the politics that accompany the litany of contemporary powerlifting federations can be irritating, I am consistently awed by the strength and the skill of the lifters that compete in the IPF. While I respect the amount of discomfort that multi-ply lifters endure while lifting insane poundages, I am much more impressed by a big single-ply or raw lift. I do not mean to insult anybody who chooses to do multi-ply lifting; I am simply stating my personal preference. Quite simply, a monolift-assisted wide-stance multi-ply squat is not my cup of tea.
Beyond my partiality as a powerlifting fan, I find that examining the lifting styles of IPF athletes rather than multi-ply lifters is much more conducive to my own lifting success. I want to lift some big weights in the squat, the bench press, and the deadlift, and I want to do so with as little help from equipment as possible. Given these goals, footage from IPF meets can be incredibly instructive. The commonalities I have noticed between IPF lifters' technique in each of the three powerlifts has enabled me to make my lifting more precise and more efficient. In the piece that follows, I will outline a bench press set-up style that I learned while watching IPF competitions. This set-up is by no means an IPF standard, but it does characterize how many of these lifters prepare to bench big weights while adhering to the strict standards of their federation.
If you complete, or plan on competing, in a powerlifting federation that requires all lifters to keep their feet flat on the floor while benching, then this method of setting up to bench can be very helpful. Or, if you employ a standard bench press style similar to the one outlined in Starting Strength, then this strategy can improve your consistency. Let's start with a video as a reference point, and then follow that demonstration by outlining each step in the process below.
(Note: Rather than rationalizing every step of the process again, I am going to refer you to my previous bench press set-up article. Each step has a purpose, and it is important to understand why you should take the time to set up correctly every time you bench. Be sure to read my previous article, if you have not done so already, in order to get some context.)
1. Set The Bar: Begin the set-up process by lying down on the bench and rolling the bar to either the front or the back of the j-hooks. Doing so ensures that the bar can be used as a reliable visual marker during every set-up. Where you choose to set the bar will impact the next stage of the set-up, so be sure to move it to the same spot before every set.
2. Eyes Under: This step in the set-up should be individualized by every lifter. I, personally, scoot back on the bench until my eyes are approximately underneath the barbell. Because I have been benching by myself in my rack, I need to press the bar out of the rack rather than "pulling" it out. This eyes-under orientation allows me to press the bar out of the rack and bring it to the starting position most effectively. While "pulling" the bar out of the rack with locked elbows is ideal, it is difficult to do so without the aid of a spotter. If you do have spotters available to give you hand-offs, then you might decide not to move as far back towards the head of the bench.
3. Set Your Grip: Once the bar and your body are positioned correctly, begin to get your grip on the barbell. If you do not already make a point of doing so, then be sure to get the bar deep into your palms as opposed to gripping the bar up near your fingers.
4. Upper Back Tight: After setting the grip, squeeze your shoulder blades together. Make sure the muscles of your upper back are tight, as these muscles must form a stable base to bench press from.
5. Bridge Up: Now that your upper body is locked into position, place your heels on the end of the bench and raise your hips up as high as possible. Use this bridge position to enhance your arch and drive your weight down through your upper back and into the bench pad.
Bridging up.
6. Drop Your Butt: Doing your best to keep your arch and the pressure on your upper back, drop your butt back down to the bench pad.
7. Set Your Feet: Dropping only one leg at a time, move your feet from the bench pad down to the floor. The sole of each foot should be flat on the floor and the toes will, usually, be angled out. Optimal stance width will be determined by each individual lifter, but it is advisable to avoid extremely narrow and extremely wide foot positions.
8. Flex Your Butt: With the feet set, flex the glutes and keep them flexed until the end of the set. If you are wondering why this is important, then refer to step number three in this article.
9. Drive and Tighten: Without allowing your feet to slide out from their set positions, drive your feet into the floor in a way that reinforces your arch and drives your stable upper back down into the bench pad. The pressure felt at the upper back should feel similar to the pressure that was created when you lifted your hips up into a bridge position earlier in the set-up.
10. Big Breath, Un-rack The Bar: With everything positioned correctly and set in a solid position, inflate your stomach by taking in a large breath, and then un-rack the barbell. Move the bar out until it is positioned directly over your shoulder joints.
A Few Notes:
-Lots of lifters in the IPF, and other powerlifting federations that require competitors to keep their feet flat on the floor while benching, prefer to wear squat shoes while they bench. Squat shoes are extremely stable and feature elevated heels, which many lifters find enhances their leg drive. If you own a pair of squat shoes, then throw them on for your next bench press session and see how you like them.
-The heels-elevated set-up that I outlined in my past article does have some advantages when compared to this "IPF-style" set-up. I, personally, find that I can arch a bit higher and get better leg drive when using a heels-elevated set-up. However, the "IPF-style" set-up offers a bit more lower body stability due to the enhanced base of support on the floor. Also, I find the "IPF-style" set-up much less taxing than the heels-elevated set-up, which is a factor worthy of consideration. The fatigue accumulated during, and from, a bench session with the heels-elevated set-up seems to require more recovery time. Conversely, the "IPF-style" set-up seems to be more conducive to higher frequency bench press training.
-The set-up styles that I have outlined are just two of many different bench press set-up methods. The underlying message is to figure out what works best for you and your goals. Think about the pros and the cons of each style, and then test them in the gym. Make your set-up your own, and then do it the same every time you bench. You will be amazed at how much more consistent you lifting, not to mention your lifting progress, will become once you lock down your set-up.
I almost always find articles about arm training to be altogether amusing. Usually, these articles come in one of three varieties:
Bro, do these 6-10 different curl variations for 3-4 sets of 8-15 reps and you will be jacked in no time. Trust me, my arms are huge.
Silly young chap, never do any isolation exercises. Just do the basic lifts and get strong and you will get bigger guns.
No, no, no. You all have it wrong. Do the basic, heavy lifts and add in some isolation movements. Aren't I reasonable? Science.
The funny thing about arm training is that it is difficult to screw up. Take a stroll through any college recreation center, and you will realize that curling consistently can net almost any idiot a decent pair of biceps. It doesn't matter if you stay up late, eat crappy food, and party on the weekends; as long as you work your biceps once or twice a week with a certain amount of focus and intensity, you will get bigger arms.
They won't get this big, but they will get bigger.
That said, I believe a lot of people could benefit from making their arm training more efficient and less random. Rather than bombarding da biceps for two hours (some guys do this, I've seen it), why not have a simple, progressive program that ensures your arms will get bigger and stronger over time? This strategy works wonders for the squat, the bench, and the deadlift. So, to a certain extent, it should also work with the barbell curl.
Now, the program I am going to outline is not for everyone. If you have been training for a while, have done a bunch of curling, and already have decent arms, then this might not be for you. If you are a newbie or if you never train your biceps because some strength coach convinced you it was useless, then this program will work for you. Essentially, if your arms are skinny and you cannot curl much weight, then this is one of the simplest, most effective solutions.
The Bigger Arms Progressive Overload Program:
Day One:
A. Barbell Curls: 3 sets of 8 reps
Day Two:
A. Barbell Curls: 3 sets of 10 reps
Notes:
-At the very least, this program is to be done twice a week. Do your best to space the two sessions out evenly; something similar to Monday-Thursday would work well. If your schedule is ridiculously open, then do each session after either one or two days of rest. This would entail getting to the gym on a variety of days, so simply stick to a standard format if you cannot make that commitment. Honestly, it doesn't really matter either way. If you do have access to a barbell every day of the week, then start with one day of rest in between sessions. As the weight begins to get difficult, begin resting two days between sessions.
-Start with a fairly easy three sets of eight reps on day one. Keep your form strict and do not use momentum. On day two, use the same weight and complete three set of ten. Then, when you start back at day one the next week, add 2.5 pounds to the weight you started with. This means you will be using the little 1.25 pound plates; if your gym doesn't have these, then buy them. They do not cost much, and you can store them in your gym bag. Taking bigger jumps than 2.5 pounds is not recommended, as the biceps are a relatively small muscle group and will not be able to continually adapt to larger weight increases. Resist the temptation to add more than 2.5 pounds, especially in the first few weeks. It is better to make consistent small improvements than it is to add too much weight too soon and hit a wall.
Add enough 1.25's and you will eventually be curling some decent weight.
-The tempo of your curls does not necessarily matter, at least for this program. Ideally, all of your reps would be fast on the way up, flexed for a count at the top, and then lowered under control. This would entail something similar to an X-1-2 tempo ("X" stands for "explosive", and it refers to the concentric
(curling) portion of the exercise; curl the weights as forcefully as
possible. The "1" tells you to do a one-second isometric contraction
while your arms are fully flexed. The "2" is for the eccentric
(lowering) phase of the movement, and it indicates that you should take
two-seconds to lower the barbell.). While this type of quality is something to strive for, your primary objective should be getting all of the prescribed reps. Aside from using momentum and using body English, just do what you need to do to get all 24 reps on day one and all 30 reps on day two.
-In between sets, rest as long as you need to, but as little as possible. As soon as you are certain that you can get all eight or ten reps of barbell curls, then do your set. Once you get deeper into the program, you will probably have to rest longer to get all of the reps. Don't be alarmed if you need five minutes between sets as you near the end of the progression. Also, it wouldn't hurt to do some soft tissue and mobility work during your rest intervals.
-Lastly, if your goal is to get bigger arms, then you cannot neglect your triceps. Your triceps training should feature thoughtfully programmed heavy pressing movements, as these exercises will have the biggest impact on the strength and size of your upper arms. Bench and (overhead) press, squat and deadlift, add in some chin-ups and some rows, and you will get bigger and stronger. This program should be nothing more than an addition to an already sound training plan. Have fun pumping up your biceps, but not at the expense of doing the "big" lifts.
A fantastic arm training program and three pictures of Arnold for motivation? Your success is all but guaranteed. Give this simple program a shot and let me know how it goes!
I cannot stand the term "core training". Unfortunately, the phrase has been
adopted into mainstream American culture and, for better or for worse,
I hear it uttered almost daily. The funny thing is that 99% of the
people who casually drop the word "core" in a conversation have no idea
what "core training" actually entails. In an effort to educate the
general public, the following article will outline contemporary "core
training" principles. Hopefully, this article will clear up some
confusion, alleviate some individuals' back pain, and decrease the
number of times that I cringe during a typical week. Read on to be
enlightened!
What is "Core Training"?
The main reason I despise the term "core training" is because it's meaning has become so generalized and diluted. Presently, everything from standing on a Bosu Ball to dancing is advertised as "core training". In addition to erroneously encompassing nearly every form of exercise under the sun, "core training" is currently touted as a magical cure-all.
"Core training"?
I want people to understand that "core training" is nothing more than one facet of a well-rounded strength and conditioning program. In some cases, it can have a positive impact on an individual's sports or lifting performance and it can improve their lower back health. However, "core training", by itself, does not provide otherworldly results. Also, while the muscles of the torso are stimulated in nearly every human movement, there is a major difference between "exercising the core" and specifically targeting the muscles of the torso with purposeful and intelligently programmed exercises. This article will focus on the latter, as the former is nothing more than a silly marketing strategy used to get the ill-informed public to pay "professionals" for an hour of random movement.
"Wow, that must be great for her core!"
(Note: For the remainder of this article, I will replace the term "core" with the word "torso". I want there to be a clear distinction between the information I am providing and the baloney that you hear in the public sphere. "Core training" is for suckers; training the torso is for purposed individuals.)
How Should the Torso be Trained?
The lower (lumbar) region of the vertebral column demands stability. While some of this section's stability is derived from the anatomical structure of the lumbar vertebrae themselves, the muscles surrounding this portion of the spine are crucial players in this area's integrity. If we want to improve the torso muscles' ability to provide stability (i.e. the ability to maintain position and resist movement) to the spine, then the methods we use to train them should reflect this objective. Utilizing exercises that promote movement at the lower back proves to be counterproductive, as moving the spine through various ranges of motion when we want that segment to maintain it's position makes no sense. Therefore, traditional abdominal exercises, such as sit-ups, curl-ups, crunches, side-bends, and twists, are out. Exercises that improve an individual's ability to stabilize their torso in multiple planes of motion are in. The adaptations induced by training are highly specific, so it is logical to train the torso muscles in a way that mimics and improves their intended function rather than using movements that promote dysfunction.
Do we want to see the spine move here? No.
Classifying Torso Exercises
Contemporary torso training exercises are commonly partitioned into four categories: anti-flexion exercises, anti-extension exercises, anti-side flexion exercises, and anti-rotation exercises. Flexion, extension, side flexion (or, lateral flexion), and rotation are four of the main movements that the spine can do, and "anti" refers to resisting these movements. The simplest example of a torso stability exercise is the plank:
You've probably done it before.
Most people have done this exercise and have felt the muscles of their torso working while in this position. When done correctly, with the spine held rigid in a "neutral" position, the plank is an effective anti-extension exercise. As you assume the prone position that characterizes the plank, your abdominal wall is bracing in an effort to prevent your lumbar spine from sagging into extension.
Beyond the plank, there are a wide variety of exercises that train the muscles of the torso to resist flexion, extension, side flexion, and rotation. An exercise that never fails to get quizzical looks and inquires in a commercial gym is the Pallof press (also know as the anti-rotation press).
The Pallof press.
The Pallof press can be done using either a resistance band or a cable column. With your arms held up in front of your chest and the pull of the resistance running perpendicular to your arms, extend your arms away from your chest. Hold this position for a second (or more, if you are doing longer isometric holds), then move your arms back to the starting position. When your arms are fully extended, the rotational force from the resistance will be at its greatest, and you should be bracing the muscles of your torso hard to resist this pull. For a more in-depth explanation of the Pallof press, click on this link. Or this link.
A Few Notes
-If getting a six-pack is the only reason that you do abdominal exercises, then you must understand that your eating habits are more important than any of the torso exercises that you do. You can sculpt the most amazing set of abs on the face of the earth while in the gym, but they will not look very good until you get rid of the layer of fat that covers them. Lock down your nutrition and then do torso exercises that improve your abdominal muscles' function. Not only will you get the six-pack that you desire, but you will also have a healthier lower back to boot.
-The torso connects the powerful hips and legs with the relatively weak upper body. Therefore, having a stable torso is incredibly important for a myriad of athletic movements. In order to transfer the power that the lower body muscles generate up through the body, the torso must be held rigid. Without this necessary torso stability, energy will "leak" out at the midsection and make for inefficient movement and substandard power production. Whether you want to knock down a running back, throw a baseball fast, or simply play a sport well, it is in your best interest to improve your torso stability.
Torso stability = big hits.
-Torso stability is an important aspect of the power lifts. The Valsalva maneuver, which entails inflating the midsection by taking in, and holding, a large breath before a heavy lift, is effective because it improves stability. Wearing a lifting belt in conjunction with this maneuver allows for even greater stability, and this stability can enable a lifter to move more weight than they can without a belt. It is important to remember, however, that the stability that a belt provides is largely artificial. The multiple layers of muscle that comprise the abdominal wall, in conjunction with the muscles of the back, work as the body's natural lifting belt. Therefore, strengthening these muscles and improving their ability to provide stability can reduce a lifter's risk for spinal injury and, potentially, improve their performance.
-I say that improving torso stability has the potential to improve a lifter's performance because not every lifter will see their lifts benefit from torso training. Your ability to move heavy weights in the squat, the bench press, and the deadlift overwhelmingly depends on the prime movers for each of these individuals lifts. The muscles of the torso are not prime movers; instead, they offer stability and allow for force generated by the lower body to be transferred up the kinetic chain and into the bar. If torso stability is sub-par, then force will not be transferred with maximum effectiveness. In this case, improving torso stability, and thereby shoring up a weak link, may allow a lifter to move heavier weights. If a lifter's midsection is sufficiently stable, then torso training offers limited rewards in terms of performance enhancement.
Further Reading
Hopefully, this summary has opened your eyes to modern methods of torso training. At the very least, you will no longer fall victim to the "core training" tricks of the many marketing wizards that plague the fitness landscape. If you would like to learn more about torso training, then be sure to check out a few of the following articles:
(Note: Sure, they use the term "core". But, the information that they provide is good, so I can live with it.)